Under Construction

Quickstart Guide Step 1: Set up your method template

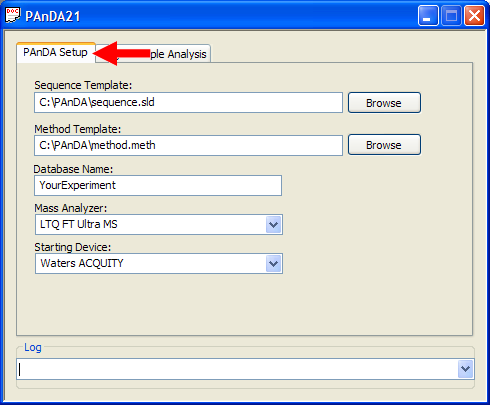
PAnDA requires a template method file that has the instructions for how to analyze your sample. Set up a method file that fits your needs, then make the following additions/changes:
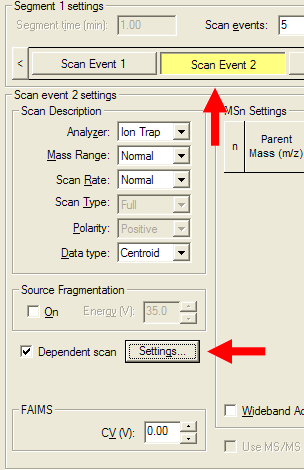
Select your first MS/MS scan event and bring up the "Settings" dialog.
Under Global->Mass Widths, put in appropriate values. Recommended values are still being evaluated, but putting mass widths appropriate for high resolution mass spectrometry is a good idea.
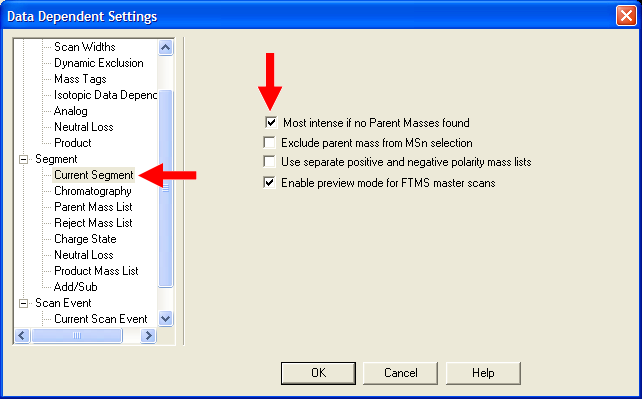
Under Segment->Current Segment, select "Most intense if no Parent Masses found". This will insure an appropriate MS/MS event will occur if the mass list does not provide a suggestion.
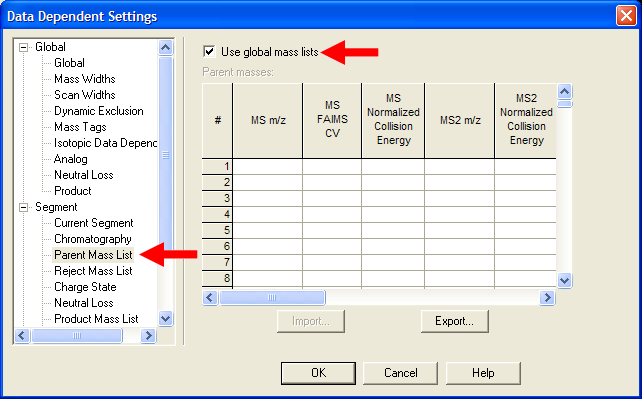
Under Segment->Parent Mass List, select "Use global mass lists". This setting is critical to using mass lists.
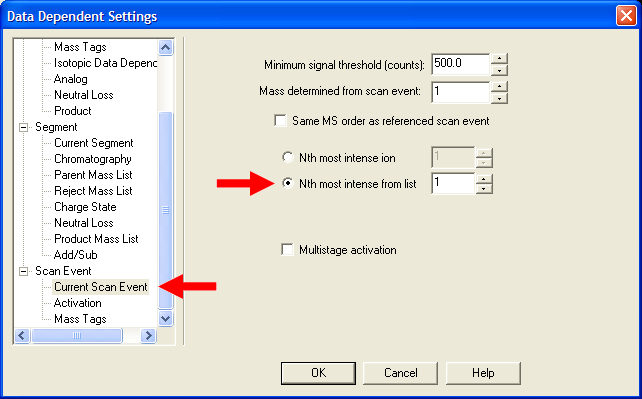
Under Scan Event->Current Scan Event, select "Nth most intense ion from list". If this is your first MS/MS scan event, put a value of 1, if this is your second MS/MS scan event, put a value of 2, etc. YOU MUST REPEAT THIS STEP FOR ALL MS/MS SCAN EVENTS!!!


Quickstart Guide Step 2: Set up your sequence template

Most of the sequence template can be left blank. All PAnDA needs to know is the location of your sample in your autosampler, and the volume you want to inject. Create a sequence file and make the following changes:
Set the position value to the correct location in your autosampler. Set the injection volume to the desired volume you want for each round of PAnDA.


Quickstart Guide Step 3: Set up your PAnDA parameters

PAnDA currently only supports single sample analysis, but more types of analysis will be added in the future.
Make sure the "PAnDA Setup" tab is selected and fill out all five fields. The method and sequence templates are the templates you created in steps 1 and 2 of this tutorial.

You can name your database whatever you want. Be sure to give it a name that is different than any previous PAnDA names so that your data is not overwritten.

Select the mass spectrometer from the "Mass Analyzer" list, and the appropriate device from the "Starting Device" list.
Switch over to the "Single Sample Analysis" tab. Set the desired number of PAnDA iterations. The "MS/MS Coverage" value indicates how many times a peptide should be sampled before it is removed from the mass list. "Retention Time Tolerance" gives flexibility to the expected elution times for peptides. The value is in minutes.

The Hardklör parameters are already set to the recommended values for typical high resolution data. Be sure to set the appropriate type of data (FTICR or Orbitrap) and the resolution you are using.


Quickstart Guide Step 4: Queue your analysis and start PAnDA

You can queue up multiple analyses with PAnDA by repeating all the steps in this tutorial for each sample you want to analyze.
Once your parameters are set, click on the "Queue" button to put your analysis in the queue. The queue is on the left.
If there is at least one item in the queue, you can press the "Play" button to start the analysis. PAnDA will take over from here and no further user interaction is necessary. You can view your data in real-time by opening up Xcalibur, however, DO NOT change any settings in Xcalibur while PAnDA is running. PAnDA can see changes in Xcalibur and those changes can cause PAnDA to fail.

Also, you can queue-up more PAnDA analyses, but DO NOT hit the play button again if PAnDA is already running. When one analysis finishes, the next analysis in the queue will start automatically. Please remember that this is alpha software, and there are a lot of wrinkles that need to get ironed out.